Extract taken from Grow Your Own Food by Deborah Schneebeli-Morrell (CICO Books, £12.99) Photography © CICO Books
Join Our World... Sign up for our exclusive newsletter.

Be inspired every day with Living North


Perhaps the most decorative vegetables, climbing beans have twining stems studded with flowers of many colours. Scarlet runner beans, with their abundant red flowers held on upright stems above lush green leaves, have long been valued for their appearance as well as their taste. Many more types are now available, with flowers ranging from white to pink, apricot and orange. Why not grow a mixture of beans together up a bamboo ‘wigwam’? Look in seed catalogues or garden centres and nurseries for varieties that can be sown at the same time.
The delicious and nutritious borlotti bean, a key ingredient of minestrone soup and other Italian dishes, has fat, cream-coloured pods speckled with red blotches (hence their alternative name “cranberry bean”). Although it is not such a heavy cropper as other beans, its particular qualities make it indispensable for the vegetable garden. Unlike green and scarlet runner beans, borlotti beans are harvested from the pods before cooking. They are best eaten fresh, although they can be dried for winter use.
The sturdy cylindrical laundry basket used here is ideal. It has been painted with fence paint, which will help to prolong its life. Lining the basket with a strong plastic bag - in this case an empty compost bag, is essential to retain moisture. An added advantage, especially if you are growing vegetables on a balcony, is that the basket is much lighter than a conventional pot of a similar size.

wicker laundry basket at least 28 inches (70cm) deep
empty potting mix sack to go inside basket multipurpose loam-based potting mix
well-rotted manure dibble
borlotti beans (Lingua di Fuoco 2)
sheet of glass with rounded edges, such as a shelf
rods or bamboo canes
exterior house paint (blue or green)
large-bristled brush


Greencare
To grow borlotti beans, you will need a fairly deep rich soil that has some well-rotted manure incorporated into the compost. Planting the beans in a deep container allows a lengthy root run and ensures that the soil will retain moisture. Keep the plants well watered, remembering to water in the evening on hot days. Like other leguminous (pea-like) plants, borlotti beans are thirsty and hungry feeders. They will tolerate some shade but need the warmth of the summer to ripen the pods.
1 Paint the basket following the instructions on the can. You may need to apply two coats to achieve complete coverage. Paint to a depth of 4 inches inside the rim. Allow to dry thoroughly.
2 Insert the plastic sack, having first cut a few slits in the base to allow for drainage. Roll the top edge over so that it fits snugly inside the basket rim.
3 Mix the compost and the manure at a ratio of roughly 3:1. Throw a few crocks or stones into the base of the basket to help with drainage before adding the mixture. Fill the last 8 inches (20cm) with multipurpose potting mix.
4 Make some holes with a dibble about 4 inches apart and sow one or two beans in each hole. You can remove the weaker of the two beans later.
5 Water the basket well, but make sure the water does not expose the planted beans.
6 Cover the beans with glass to raise the temperature of the soil. This will encourage the beans to sprout.
7 When the first true leaves have appeared, push a rod or cane into the earth beside it – the beans will quickly twine around it.
If you grow scarlet runner or green beans, pick them regularly to ensure a continuing crop. Allow borlotti beans to swell in the pod before harvesting. If you want to dry them, allow the pods to shrivel slightly on the vine before picking for storage.
Vintage galvanised domestic and agricultural items, such as washtubs, buckets, trays, watering cans and grain bins, are becoming sought after as practical planters. There is something about the gentle grey of the metal and the pleasing shapes and proportions of these objects that makes them ideal containers for plants. They are lightweight and good at retaining moisture – none evaporates through the non-porous sides.
Courgette are large, thirsty, hungry plants that need a large container – a washtub is an ideal size. They are easy to grow and, given the right conditions, they romp away, creating a virtual jungle of stems and leaves. Courgette become slightly bitter if they are not eaten immediately after harvest. Pick them often – if they are allowed to grow too large, the plant will be less productive.
If you don’t have enough space to start them inside, you can sow courgette direct into their permanent position; but wait until late spring. You could make a mini cloche from a plastic water bottle for added protection. Alternatively, buy young plants from a garden centre or nursery or plant sale; many varieties are available and, since you will need only two or three plants, this is a sensible option.

old galvanised metal washtub
hammer and large nail
bucket of gravel (for drainage)
multipurpose soilless potting mix and rich loam-based mix
well-rotted horse manure
bucket of comfrey leaves (if available)
organic fish fertiliser
two or three zucchini courgette plants
Courgette varieties
There are many varieties of courgette, ranging in colour and shape from golden yellow (a less vigorous plant) to dark shiny green, striped or pale-skinned, and from long to globe-shaped. Grow two or three varieties and see which you like. Start them off in spring under cover or inside. Push the flat seeds down into a seed-starting mix in individual pots – you can sow two seeds together and remove the weaker seedling as they grow.
1 With the washtub the right way up and resting on soft ground, make a number of drainage holes evenly in the base with the hammer and nail.
2 Empty the bucket of gravel into the tub and spread it evenly across the base. This layer will encourage good drainage.
3 Mix together the two potting mixes in equal quantities and empty into the washtub, covering the gravel to a depth of about 4 inches (10cm).
4 Collect the comfrey leaves and chop them roughly. Cover the soil with a thick layer of chopped leaves. This will provide a rich nutritional boost to the growing plants as the roots reach down.
5 Fill up the tub to the rim with the combined potting mixes, this time adding one part well-rotted manure to four parts mixture.
6 Sprinkle the organic fish fertiliser on the surface of the soil. (First read the manufacturer’s instructions and don’t use too much.) Lightly dig it in.
7 Plant the young courgette equidistantly from one another, and firm down the soil around them. Water well. Keep the mixture moist and never let the soil dry out.
If you can’t find fresh comfrey leaves to add to the potting mix, you could feed the courgettes weekly with a diluted tomato or seaweed extract instead.


‘Tumbling Tom’ is a small, prolific tomato plant that’s ideal when you don’t have much space. It will grow happily in any kind of container, as long as it is planted in a rich mixture and fed from the time when the fruits begin to mature. Two or three plants in a window box will give you a heavy crop of sweet cherry tomatoes all summer.
Cherry tomatoes are perhaps the easiest tomatoes to grow. Being compact bushes, they don’t need any pinching out. For tomatoes to thrive outside, they need to be in a warm place – against a sunny wall, for example, where the stone or brick will retain warmth after the sun has disappeared at the end of the day.
If you grow this variety of tomatoes in a hanging basket, you must be vigilant about watering and feeding. It may help to add a small quantity of water-retaining granules to the loam-based mixture to ensure that the soil stays moist. In hot weather, water twice a day. Purpose-made hanging baskets of various kinds are available at garden centres. The one used in this project is a vintage wire basket that is extremely decorative. Hang the basket from an old cast-iron bracket, if you can find one.

wire hanging basket of your choice (plus chain and hanging bracket if necessary)
sphagnum moss for lining basket
rich loam-based compost
water-retaining granules
tomato plant (Tumbling Tom, red)
spare bucket (to rest basket in)
Greencare
Sow the seed from late winter until early spring in individual pots and cover with potting mix to exclude the light. If you keep the pots in a warm place, the seeds should germinate in a week. Choose the sturdiest seedling in each pot and discard the rest. Allow it to grow, only putting the young plant outside to harden off when the weather warms up. If there is danger of frost at night, bring the plants indoors.
Tomatoes need at least three months of warm weather (ideally, between 70 (21C) and 80F (26C), during the day and about 10 degrees lower at night) to produce sweet fruit.
Rain, wind and variations in temperature can make the leaves look bedraggled. Very hot temperatures (above 100F (37C)) make pollen infertile and suspend the growth of the fruit. By choosing an early-season and a mid-season cultivar, you can enjoy homegrown tomatoes for many months.
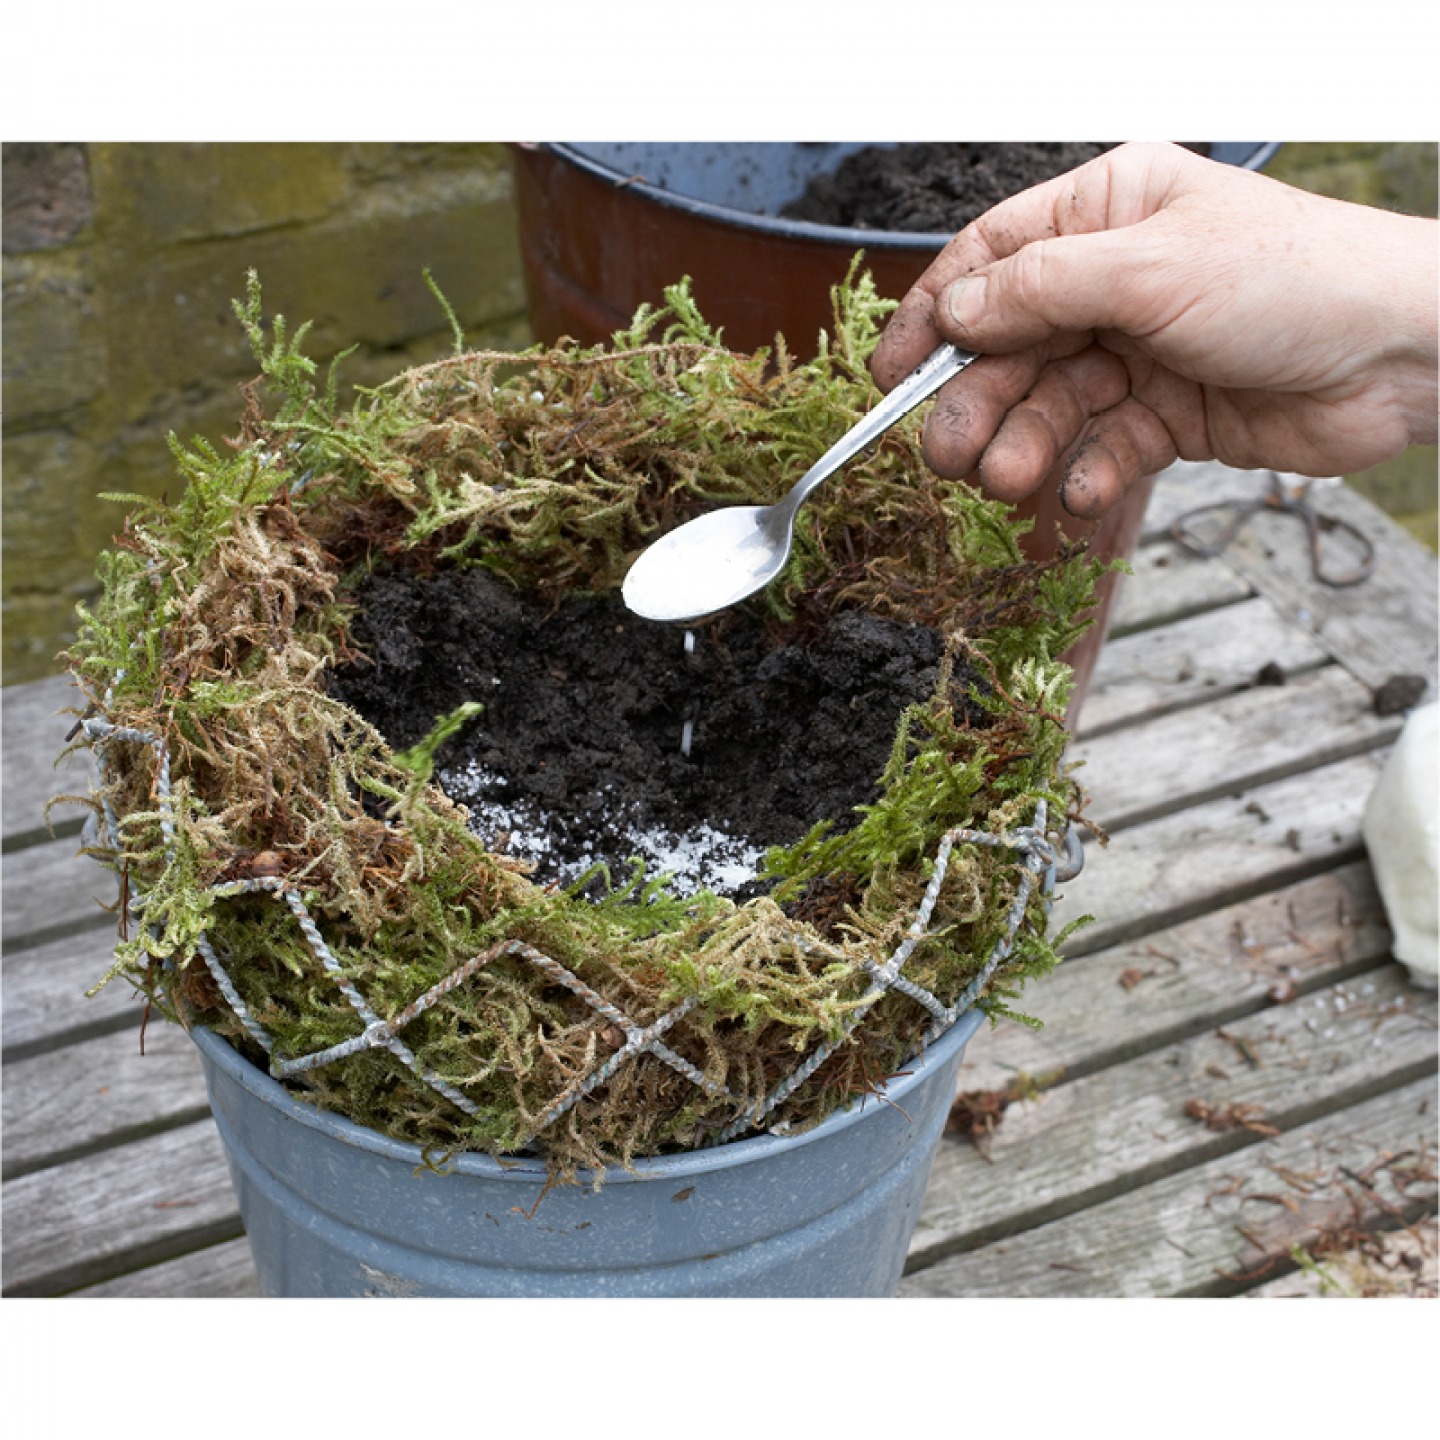
1 Line the hanging basket with the moss, creating a thick, even layer around the sides and base, and filling any gaps.
2 Rest the basket in the spare bucket. Put some potting mix in the base, and add a small amount of water-retaining granules (follow the manufacturer’s instructions).
3 Fill the basket to the top with potting mix and make a hole in the centre large enough to take the tomato plant.
4 Place the tomato plant in the hole and secure it by firming it in with your fingers. Water well.


Extract taken from Grow Your Own Food by Deborah Schneebeli-Morrell (CICO Books, £12.99) Photography © CICO Books